from this......
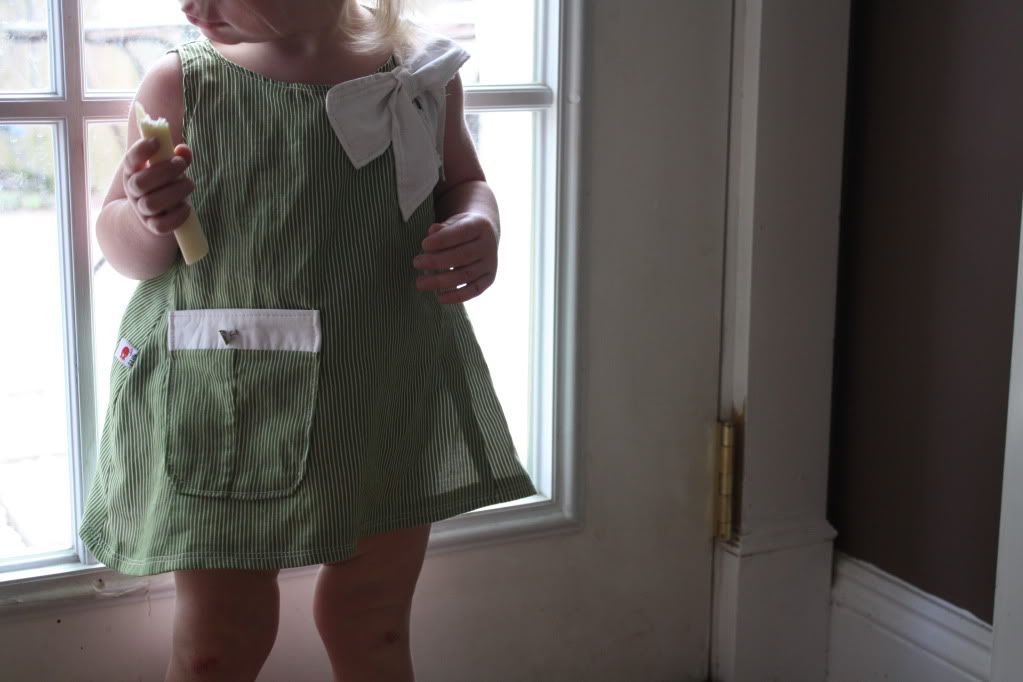
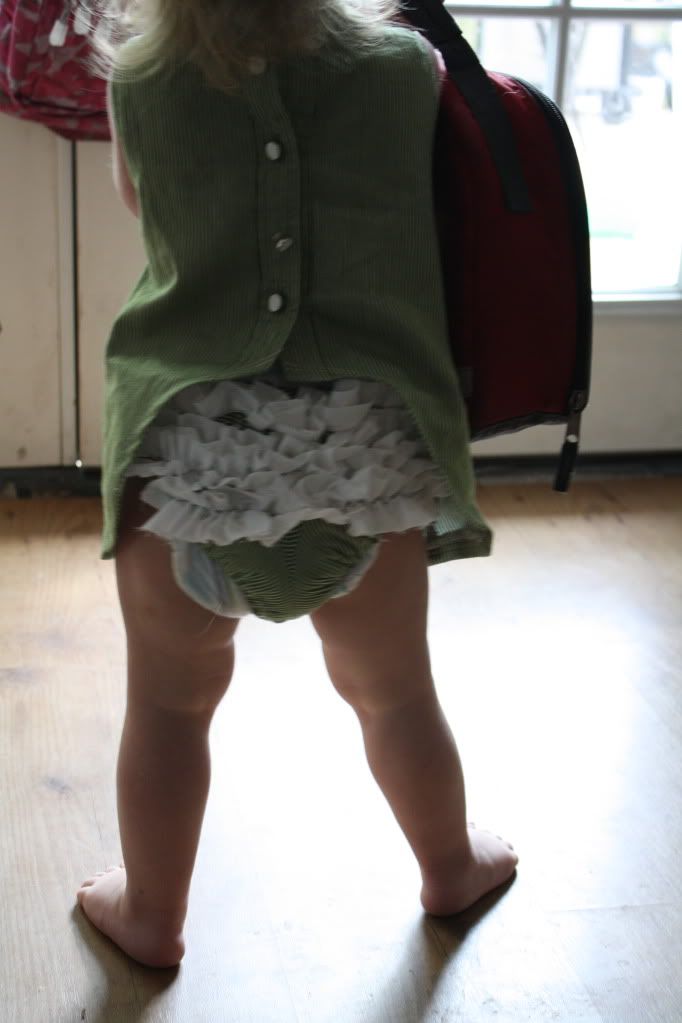
to this!
I got the shirt for $1 on my first thrift shopping adventure.
I loved the vintage feel of the green and white stripes with the crisp white cuffs and collar, and the buttons--although plastic--are cute.
Unfortunately, once I got it washed and pressed, I sat there and stared at it, unsure where I wanted to go with it.
So I did what all good refashioning bloggers do when they have a sewer's block...
I jumped right in--I cut it in half. (really, just me? no one else does that?)
Actually, I cut the top of it off, just under the sleeves.

(Kind of looks like a bustier and shrug, doesn't it? Maybe I should stop here)
Now I'm getting somewhere. I want the buttons to go down the back, so I marked and cut my front and back dress shapes, using a dress that had the basic shape I was looking for as a pattern:

(Note: I kind of just hit the main points of how I did this. Alot of the specifics, like using an existing dress to make a pattern, or making ruffles, well--there's TONS of good bloggers out there writing posts on how to do it. I've done some myself. So I'm assuming you either know how to do it, or can figure it out, or will google them. I figure I'm wordy enough without explaining every little detail too...)
I decided to trim the back to be one of those little dresses that open up and show the panties/diaper cover (anyone know what they're called?)

(kind of looks like I'm making a mermaid costume, no?)
Now we start sewing:
First I serged all the edges, just to clean it up. Then I sewed the front and back together at the shoulder straps.

I totally left my toes in here on purpose. Don't hate--that's a shiny new pedicure you see...nothing says "spring" like pretty toes ya'll :0)
Then I unbuttoned the back and sewed the side seams up (inserting one of my little tags!):

What were the back darts of the shirt became a cute detail in the dress--the stripes changing direction and cute seaming.
This is the fun of refashioning~~for all intents and purposes, once I hem this I have basically completed a dress! But I wanted to add a little. So I took my collar and cut it in half.

The top part of the collar (with the points) I serged the raw edge, folded it into a basic bow and stitched to right on to the top.
The bottom part of the collar I sewed on a leftover section of striped fabric and attached it to the dress as a little pocket.
NOW we have a completed dress:

So all that was pretty easy, right? But I wanted a matching diaper cover. And when I looked at that top piece I had cut off--with the sleeves and back, I kind of saw the cover already there waiting to happen:

Do you see it???
Take the section of shirt, turn it inside out and hold right sides together. Sew the right sides together through the armpit area (which will become the crotch) and up a few inches on the front and the back. Here's two photos that I hope help explain:
Next I trimmed a little off the old arms/new legs, and cut the top off evenly to start getting a shape more like a diaper cover.

I cut open the french cuffs, separating the two layers of white fabric, and made four rows of ruffles that I attached to the back of the diaper cover.

Elastic in the top and around the leg openings (I used the pink cover for sizing) completes the look!


And the best part? Seeing it on my model/muse/Little Bear!

(most of our important photo shoots are done with the aid of cheese sticks)


Linking to:
Just Something I Whipped Up Mondays @ the Girl Creative
Craftastic Monday @ SewCanDo
Lucky Linky Tuesday @ Lucky Star Lane
Make It Yours Day @ My Backyard Eden
Whatever Goes Wednesday @ Someday Crafts
Penny Pinching Party @ The Thrifty Home
Boardwalk Bragfest @ BobbyPins Boardwalk
Craft Therapy @ Life in the Pitts
Idea Sharin' Wednesday @ Women Who Do It All
Show & Tell @ Blue Cricket Design


This is adorable and I love how you curved it in the back so the cute ruffles show! Thanks for linking to my Craftastic Monday party:)
ReplyDeleteThis dress ROCKS!!! you did an amazing job! Definately stealing this idea!!!
ReplyDeleteThank you so much for your sweet comments on my blog!
mackenziescraftymom.blogspot.com
Oh, this is adorable. Thanks for sharing the tutorial. I am excited to follow your blog.
ReplyDeleteI love to refashion, my blog is at
beckyscraftcloset.blogspot.com
How adorable! I'm so glad I stopped by, this really cheered me up. Visiting from SITS. Have a happy Tuesday and come be sometime and visit me.
ReplyDeleteAimee
http://myhomespunthreads.blogspot.com/
Thank you everyone!
ReplyDelete@Cheryl--thanks for hosting the link party!
@Janel--Let me know how it turns out if you try this!
@Pearl Girl--I'll be by to visit! Thanks so much!
@HomeSpun Threads--I'm glad to cheer you up! I'll stop by and visit you too!
oh my! i love!
ReplyDeleteThat is TOOOOOO cute!
ReplyDeleteI'll have to repurpose me some shirts for the grandbaby.
That is so cute! I just love how her little ruffled butt shows in the back of the jumper! Great job repurposing that old shirt!
ReplyDeleteThanks for linking up to Make it Yours day!
Adorable! I just love the little hiney ruffle!
ReplyDeleteumm, yeah . . . so that's amazing. and i am SO jealous!
ReplyDeleteok, i just tried to comment and it didn't work. you may end up with 2. anyway, i was just saying thanks for stopping by my blog. and, i love a ruffle bootie outfit on a little girl. this is brilliant!
ReplyDeleteAHA! ruffle bootie outfit! That's it! :0)
ReplyDeleteSo Cute! I love ruffled baby butts!
ReplyDeleteThanks for linking at Lucky Star Lane!
you are a genius!
ReplyDeleteThis is quite possibly THE most adorable refashion I have ever seen! LOVE it! :)
ReplyDelete~Jen